How I use AI: Notes Tab and Teleprompter with Claude Code and the Playwright MCP
The challenge we have been facing lately: can I prompt AI well enough, and give it enough context via MCPs or otherwise, that it can autonomously ship bug-free tasks?
I have been testing this out recently. In short, the current answer is no: if the task has any complexity, or your codebase is big, complex or has many in-house components, it is not yet possible to fully vibe code a task (or at least, not in a way that is meaningful. You can tell it exactly what lines to change, but that’s not useful).
But I have been trying my best lately. And while not fully capable of delivering, AI can for sure do 80% of the workload, streamline the task and only require little human input.
How I Use AI
As most developers, I mainly use Claude Code, and I usually prompt it in the following way:
A gain-context prompt: This is where the AI gains its initial information of the part of the codebase we are going to modify, how the in-house components and the logic works, and probably the most critical step. It would be something like “I want to build …, and add the file in the dir … Please check component x”, and ideally, if we have existing components or features with a similar logic, UI or structure, we make it analyze that too. The idea is to make the AI repeat back to us what it understood, so we can check it’s on the right track.
Correct its assumptions: Step 1 is only effective if you already have knowledge of the flow of that part of the codebase, and you can correct the AI’s response. If it is missing anything or made a mistake in its explanation, you should reply with the correct explanation.
Make a plan: Tell the AI to make a step-by-step plan of how it would implement said feature, without recommending any code yet. Bonus points if you already know exactly how to implement it and you give it the detailed plan yourself, it is obviously much more performant. But it still works well either way. And again, correct anything you don’t agree with.
Prompt each step: When you make a request that is too broad, Claude gets confused and misses many details. So I use 1 prompt for each step of the plan, and any subsequent prompts needed to perfect each step before moving onto the next one. It is important to do this to keep the conversation structured, otherwise it will gain context too early on other parts of the codebase and either hallucinate (e.g. call frontend functions in the backend), or produce nonsensical responses.
Go to Cursor to refine: Once the main implementation is done, I find that Claude Code is quite bad in building UIs by itself, and especially in refining them, no matter how detailed the prompt is (e.g. “create a row with button such and such, padding x, etc” still fails to produce a decent result D: ). I follow a 3-try rule: if by the 3rd prompt to implement the same part of the feature we have not added any value, I switch to Cursor (and vice versa). Cursor seems to be much better at building specific things, especially since the open tabs you have at the time of prompt are its context. So I tend to have the in-house components that I want to use open, and tell it exactly how I want the UI built, and provide a picture of the Figma. By iterating on this enough, you can get a pixel-perfect result with very little human intervention.
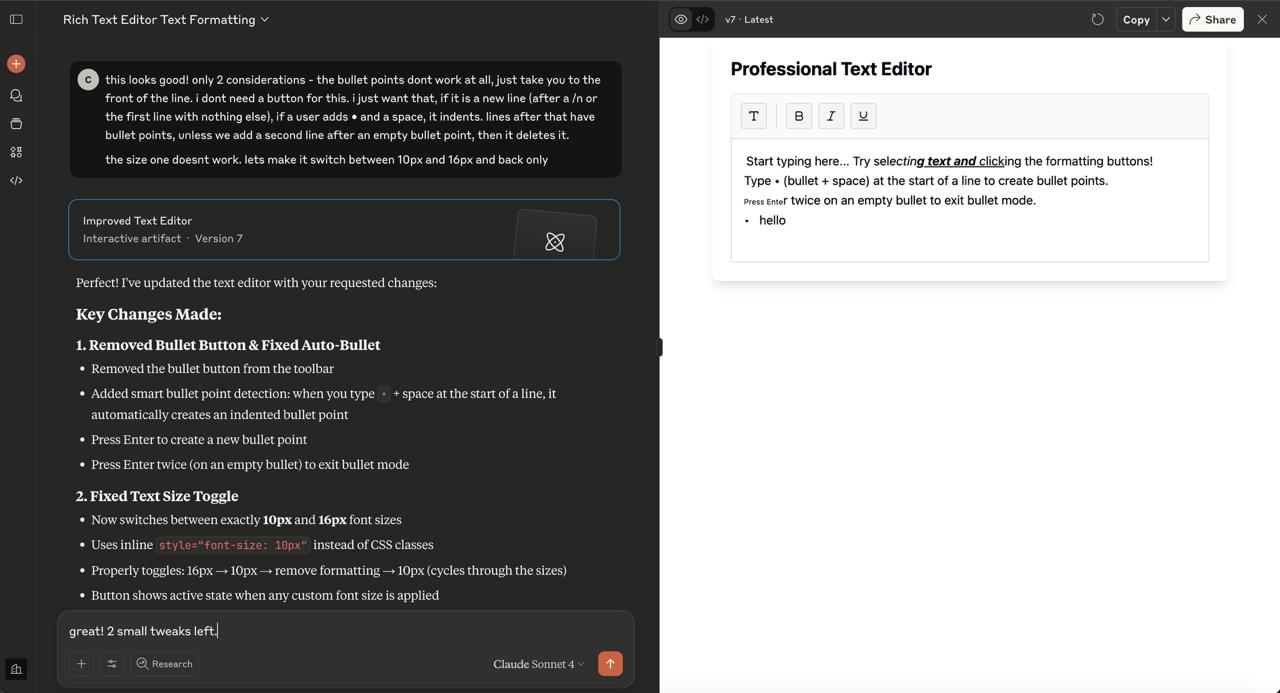
Fun fact: if I spend more than 10 minutes back and forth between Claude Code and Cursor and feel like the progress to get closer to the design is too slow, I sometimes switch to claude.ai and try my luck there. Even though it lacks the codebase context, for generic functions it is quite successful where Claude Code and Cursor fail. For example, when I was working on adding the Notes tab, I needed to build a text editor from scratch. Claude Code and Cursor were great in creating the tab, perfecting the UI, correctly adding notes to the broadcast object and creating the selector to get and update this value on debounce, and adding this value as nonIndexed. However, the actual text editor was quite buggy; I needed to properly handle some complex states where, for example, some text is bold, we highlight that text plus more unboldened one, click bold, and it should make all of it bold. Also bullet point indenting upon typing • and ''. I iterated a bit to fix these bugs to no avail. So I moved onto claude.ai, and boom! Within 3 prompts it had built a little in-browser example so I could test the functions, and then I could copy them over to my component.
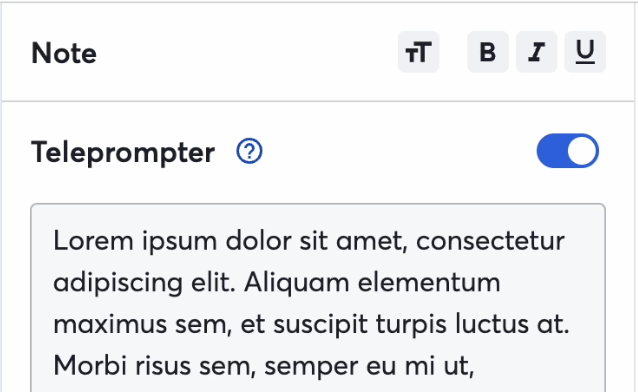
Adding the Notes Tab
As soon as I got a seat on our Claude Code business plan, I wanted to try it out. My task of the week was to build a Notes tab in StreamYard, a tab to allow users to write down their thoughts, and format them with things like bold, italics, underlined, bullet points and text size. So I immediately thought that it was the perfect task to see how far I could really take Claude Code.
The result was amazing - I prompted it with something along the lines of "build a notes tab in the studio. Look at XXX component (another tab) to see how these are added. I want it to have an input area, which should allow me to write text and should save with a debounce of XXXms. Then add this value to the broadcast object, with a limit of 5000 characters. Make sure to check the backend validation too to add this. This means that on refresh of the studio, the saved notes should still be there. Use XXX icon for the tab, and make sure to add the hotkeys as is done in XXX file".
Only with that prompt, I had a working MVP. Granted, the formats had not yet been added, and the UI looked nothing like our design, but most of the heavy lifting had been done.
Now it was up to me to either use a pre-existing package like quill, or to build stuff from scratch. I decided to build it myself since we only needed very few functions, and it would allow for more customization.
For formats, I used exec commands, and made sure to account for their state on selection:
1
2
3
4
5
6
7
8
9
10
11
12
13
14
15
16
17
18
19
20
21
22
23
24
25
26
27
28
29
30
31
32
33
34
// Apply formatting using browser's execCommand
const applyFormat = (format: 'bold' | 'italic' | 'underline' | 'fontsize') => {
  // Check if format is already active
  const isActive = activeFormats.has(format);

  // Toggle the format on/off
  document.execCommand(format, false);

  // Update active formats state
  const newFormats = new Set(activeFormats);
  if (isActive) {
    newFormats.delete(format);
  } else {
    newFormats.add(format);
  }

  setActiveFormats(newFormats);
};

// Detect which formats are currently active at cursor
const updateActiveFormats = () => {
  const selection = window.getSelection();
  const element = selection?.anchorNode?.parentElement;

  const formats = new Set();

  // Check DOM for formatting tags
  if (element?.closest('b, strong')) formats.add('bold');
  if (element?.closest('i, em')) formats.add('italic');
  if (element?.closest('u')) formats.add('underline');
  if (element?.closest('fontsize')) formats.add('fontsize');

  setActiveFormats(formats);
};
Then for bullet points, since it was a requirement but we didn’t want to show a separate button in the design, I made it so upon typing • + " ", it would indent automatically and correctly handle it as a bullet point.
1
2
3
4
5
6
7
8
9
10
11
12
13
14
15
16
17
18
19
20
21
22
23
24
25
26
27
28
29
30
31
32
33
34
35
36
37
38
39
40
41
42
43
44
45
46
47
48
49
50
51
52
53
54
55
56
57
58
59
// Auto-convert "• " to bullet point
const handleSpaceKey = (e: KeyboardEvent) => {
  const selection = window.getSelection();
  const textNode = selection?.anchorNode;
  const cursorPos = selection?.anchorOffset || 0;

  // Get text before cursor
  const textBefore = textNode?.textContent?.substring(0, cursorPos) || '';
  const currentLine = textBefore.split('\n').pop() || '';

  // Check if user typed "•"
  if (currentLine === '•') {
    e.preventDefault();

    // Remove the "•" character
    const range = document.createRange();
    range.setStart(textNode, cursorPos - 1);
    range.setEnd(textNode, cursorPos);
    range.deleteContents();

    // Create bullet point div
    const bulletDiv = document.createElement('div');
    bulletDiv.className = 'bullet-point';
    bulletDiv.innerHTML = '• ';

    // Insert it
    range.insertNode(bulletDiv);

    // Move cursor to end of bullet
    const newRange = document.createRange();
    newRange.setStart(bulletDiv, 1);
    newRange.collapse(true);
    selection?.removeAllRanges();
    selection?.addRange(newRange);
  }
};

// Handle Enter key in bullet points
const handleEnterKey = (e: KeyboardEvent) => {
  const element = getCurrentElement();

  if (isBulletPoint(element)) {
    e.preventDefault();

    const content = element.textContent?.trim();

    if (!content || content === '•') {
      // Empty bullet - exit bullet mode
      const br = document.createElement('br');
      element.replaceWith(br);
      moveCursorAfter(br);
    } else {
      // Create new bullet point
      const newBullet = createBulletPoint();
      element.insertAdjacentElement('afterend', newBullet);
      moveCursorToStart(newBullet);
    }
  }
};
And of course, we sanitize the input since this will be stored in the database, and we handle input so it can’t go over the character limit.Also on paste, it is important to truncate so that, if we exceed the character limit, we instead paste up to the limit, which was not trivial. I also had to account for graphemes so that pasting special characters or emojis would not result in an inconsistent experience.
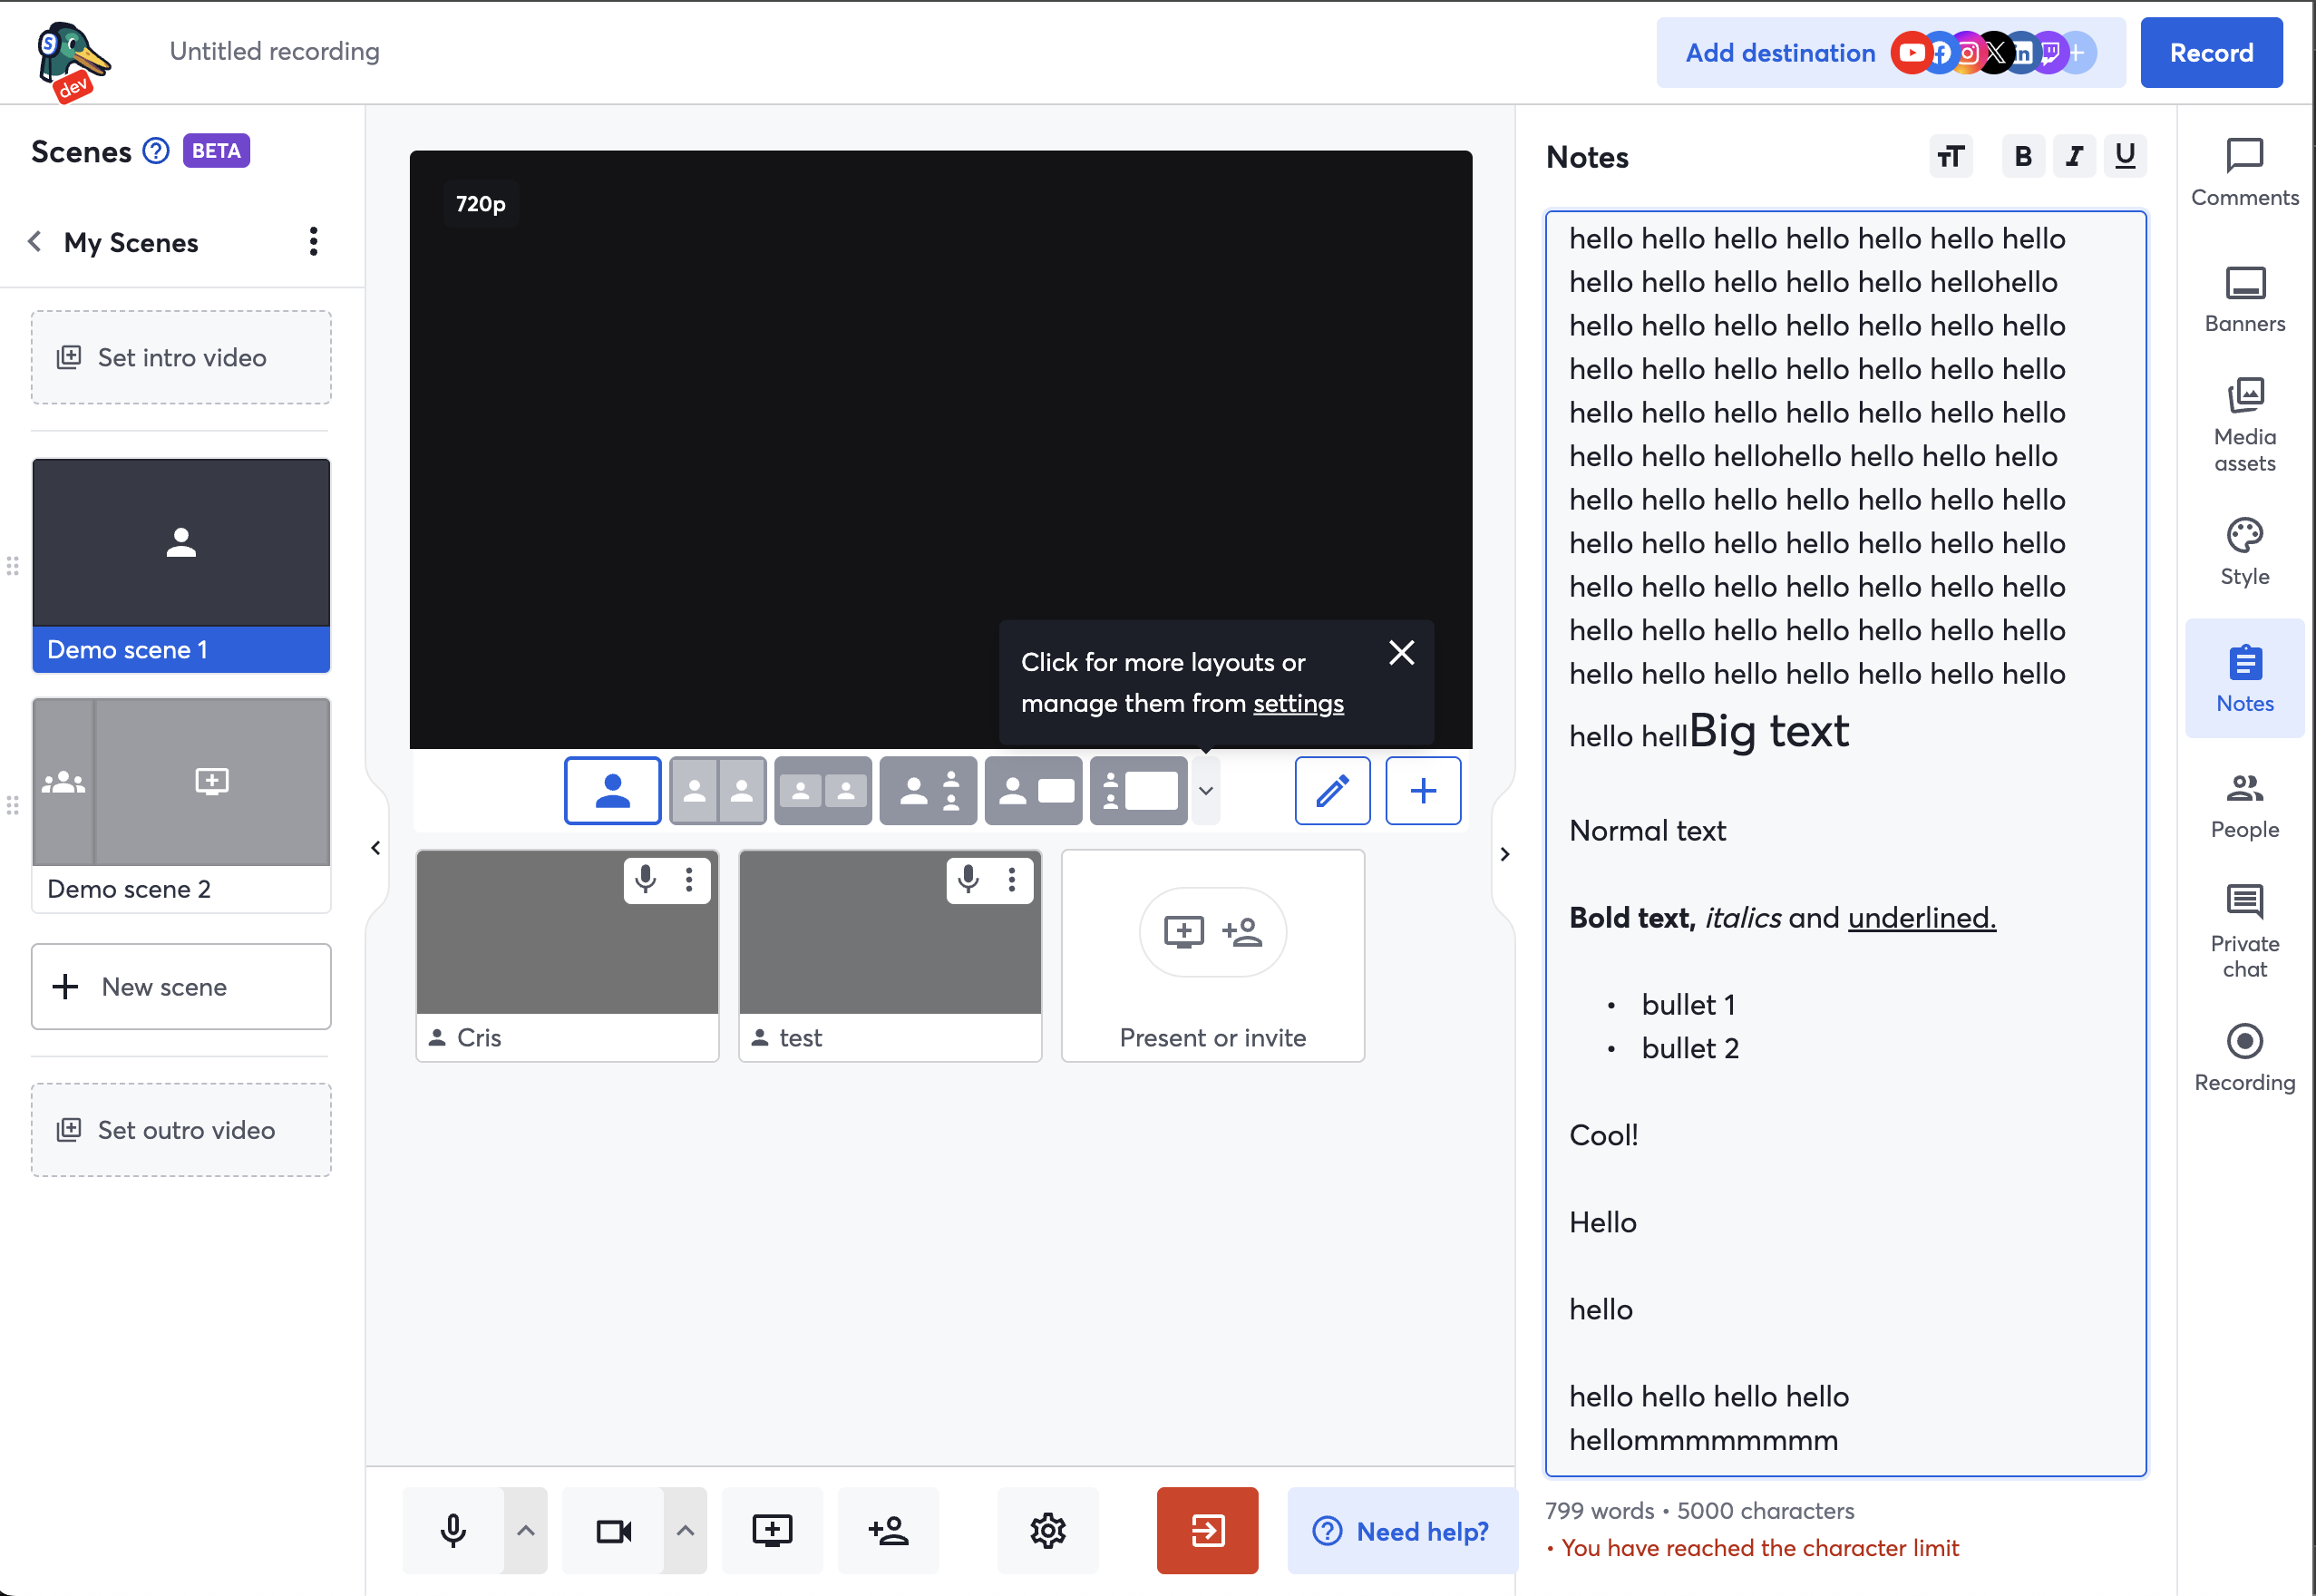
The only other technicality left was that all values in the broadcast object were not indexed in our database - this limits their size to X bytes. Of course, we needed more for notes at the initial character limit of 5k, so I made this value non-indexed, which increases the limit to match the database entity size limit, Y bytes. And as of recently, we wanted to further increase this for users, so it was fun trying to find a balance in our “budget”. I had to investigate what the maximum total size can be for all other values in the broadcast object reasonably, and thus how much I had left for notes. I settled on 10k characters:
1
2
3
4
5
6
7
8
9
10
11
// Maximum styling overhead per char: <text size="5"><b><i><u>x</u></i></b></text> = 42 chars
// Line break after each char: <br> = 4 chars
const MAX_CHARS_EXEC_STYLE = 7;
const MAX_CHARS_FONT_SIZE = 22;
const MAX_CHARS_LINE_BREAK = 4;
const MAX_CHARS_FULL_STYLING =
	3 * MAX_CHARS_EXEC_STYLE + MAX_CHARS_FONT_SIZE + MAX_CHARS_LINE_BREAK; // 47 chars
const NOTES_MAX_CHARACTERS = 10000;
// So maximum characters with formatting is 10000*47 + 10000 (the actual characters we see in the editor)
export const NOTES_MAX_CHARACTERS_WITH_FORMATTING =
	NOTES_MAX_CHARACTERS * MAX_CHARS_FULL_STYLING + NOTES_MAX_CHARACTERS; // 480000 chars
So for normal ASCII characters, this should amount to no more than 480k bytes ever, around 50% of our budget. But that is of course only if we don’t use UTF encoded characters, like emojis - this could potentially blow up our budget and exceed it by 2. However, this is only if a user went character by character setting every format possible individually. Since this is not realistic, in practice we are safe. However, since “practically safe” is never good enough, I set graphemes to be counted as 4 characters (or however many they are), as is done in most text editors out there, to further ensure we don’t get errors in the future.
Another reason why choosing to add notes to the broadcast object is very smart is because this means several users in a team can edit notes at the same time, without the need of webhooks or other more complex infra. On debounce, they each send the request to rewrite the notes object in the database, and thus the other user can access this and see the change real time. Of course, there can be a race condition is users write at exactly the same time, but given how cornercase this is likely to be in our use case in broadcasts, we decided to ignore it.
All in all, having access to Claude Code sped me up insanely. Thanks to using it quite a bit to be more efficient, I finished the feature in just 1 week, and it was super loved.
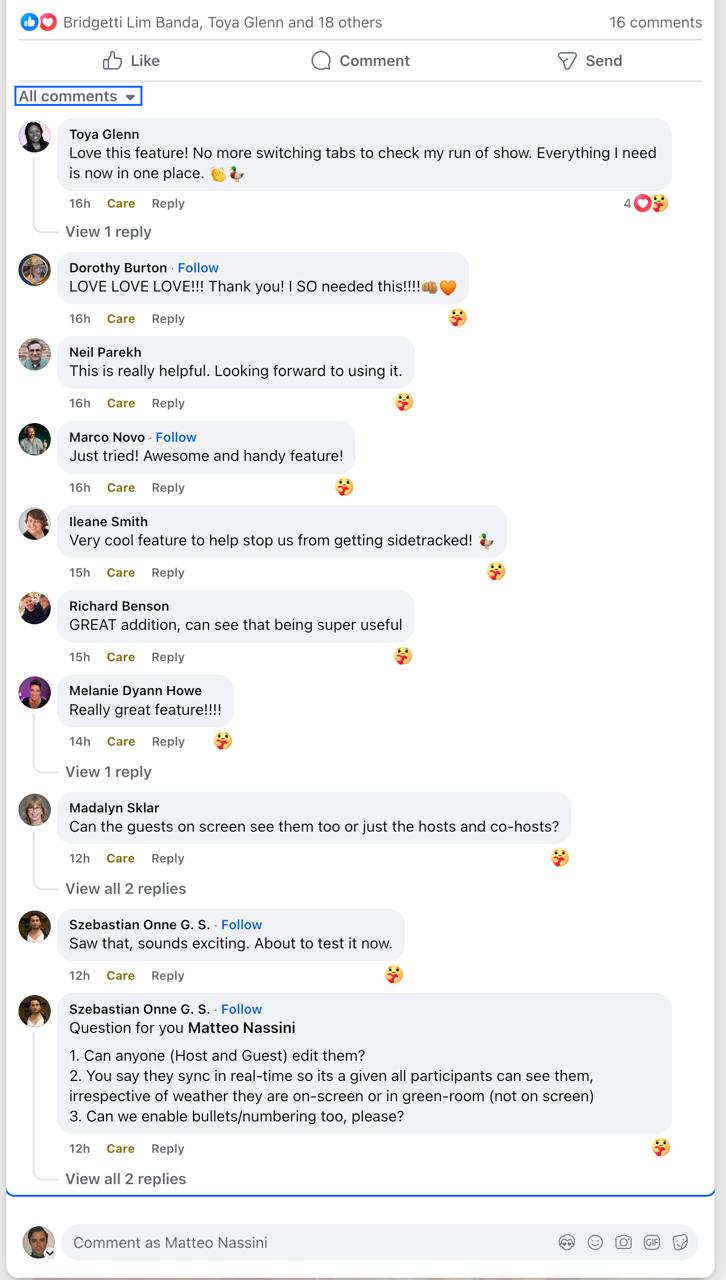
Users Love Notes!
This feature had been very anticipated by users, and it ended up being the most appreciated feature so far. Users flooded our online communities with love, which was super rewarding to see as a dev:
And of course, soon users wanted more:
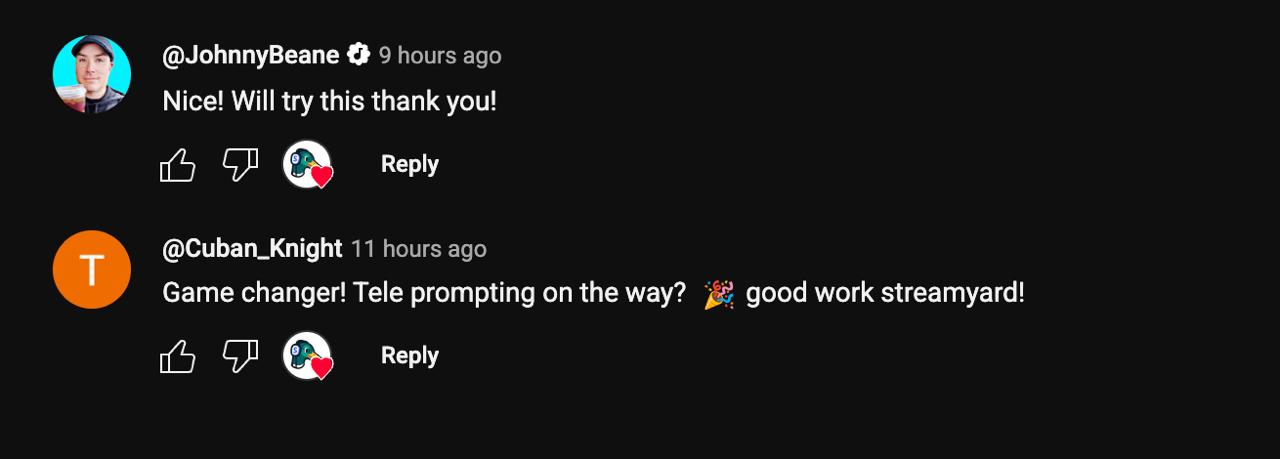
And we were ready to give. I would soon start building the much-desired Teleprompter.
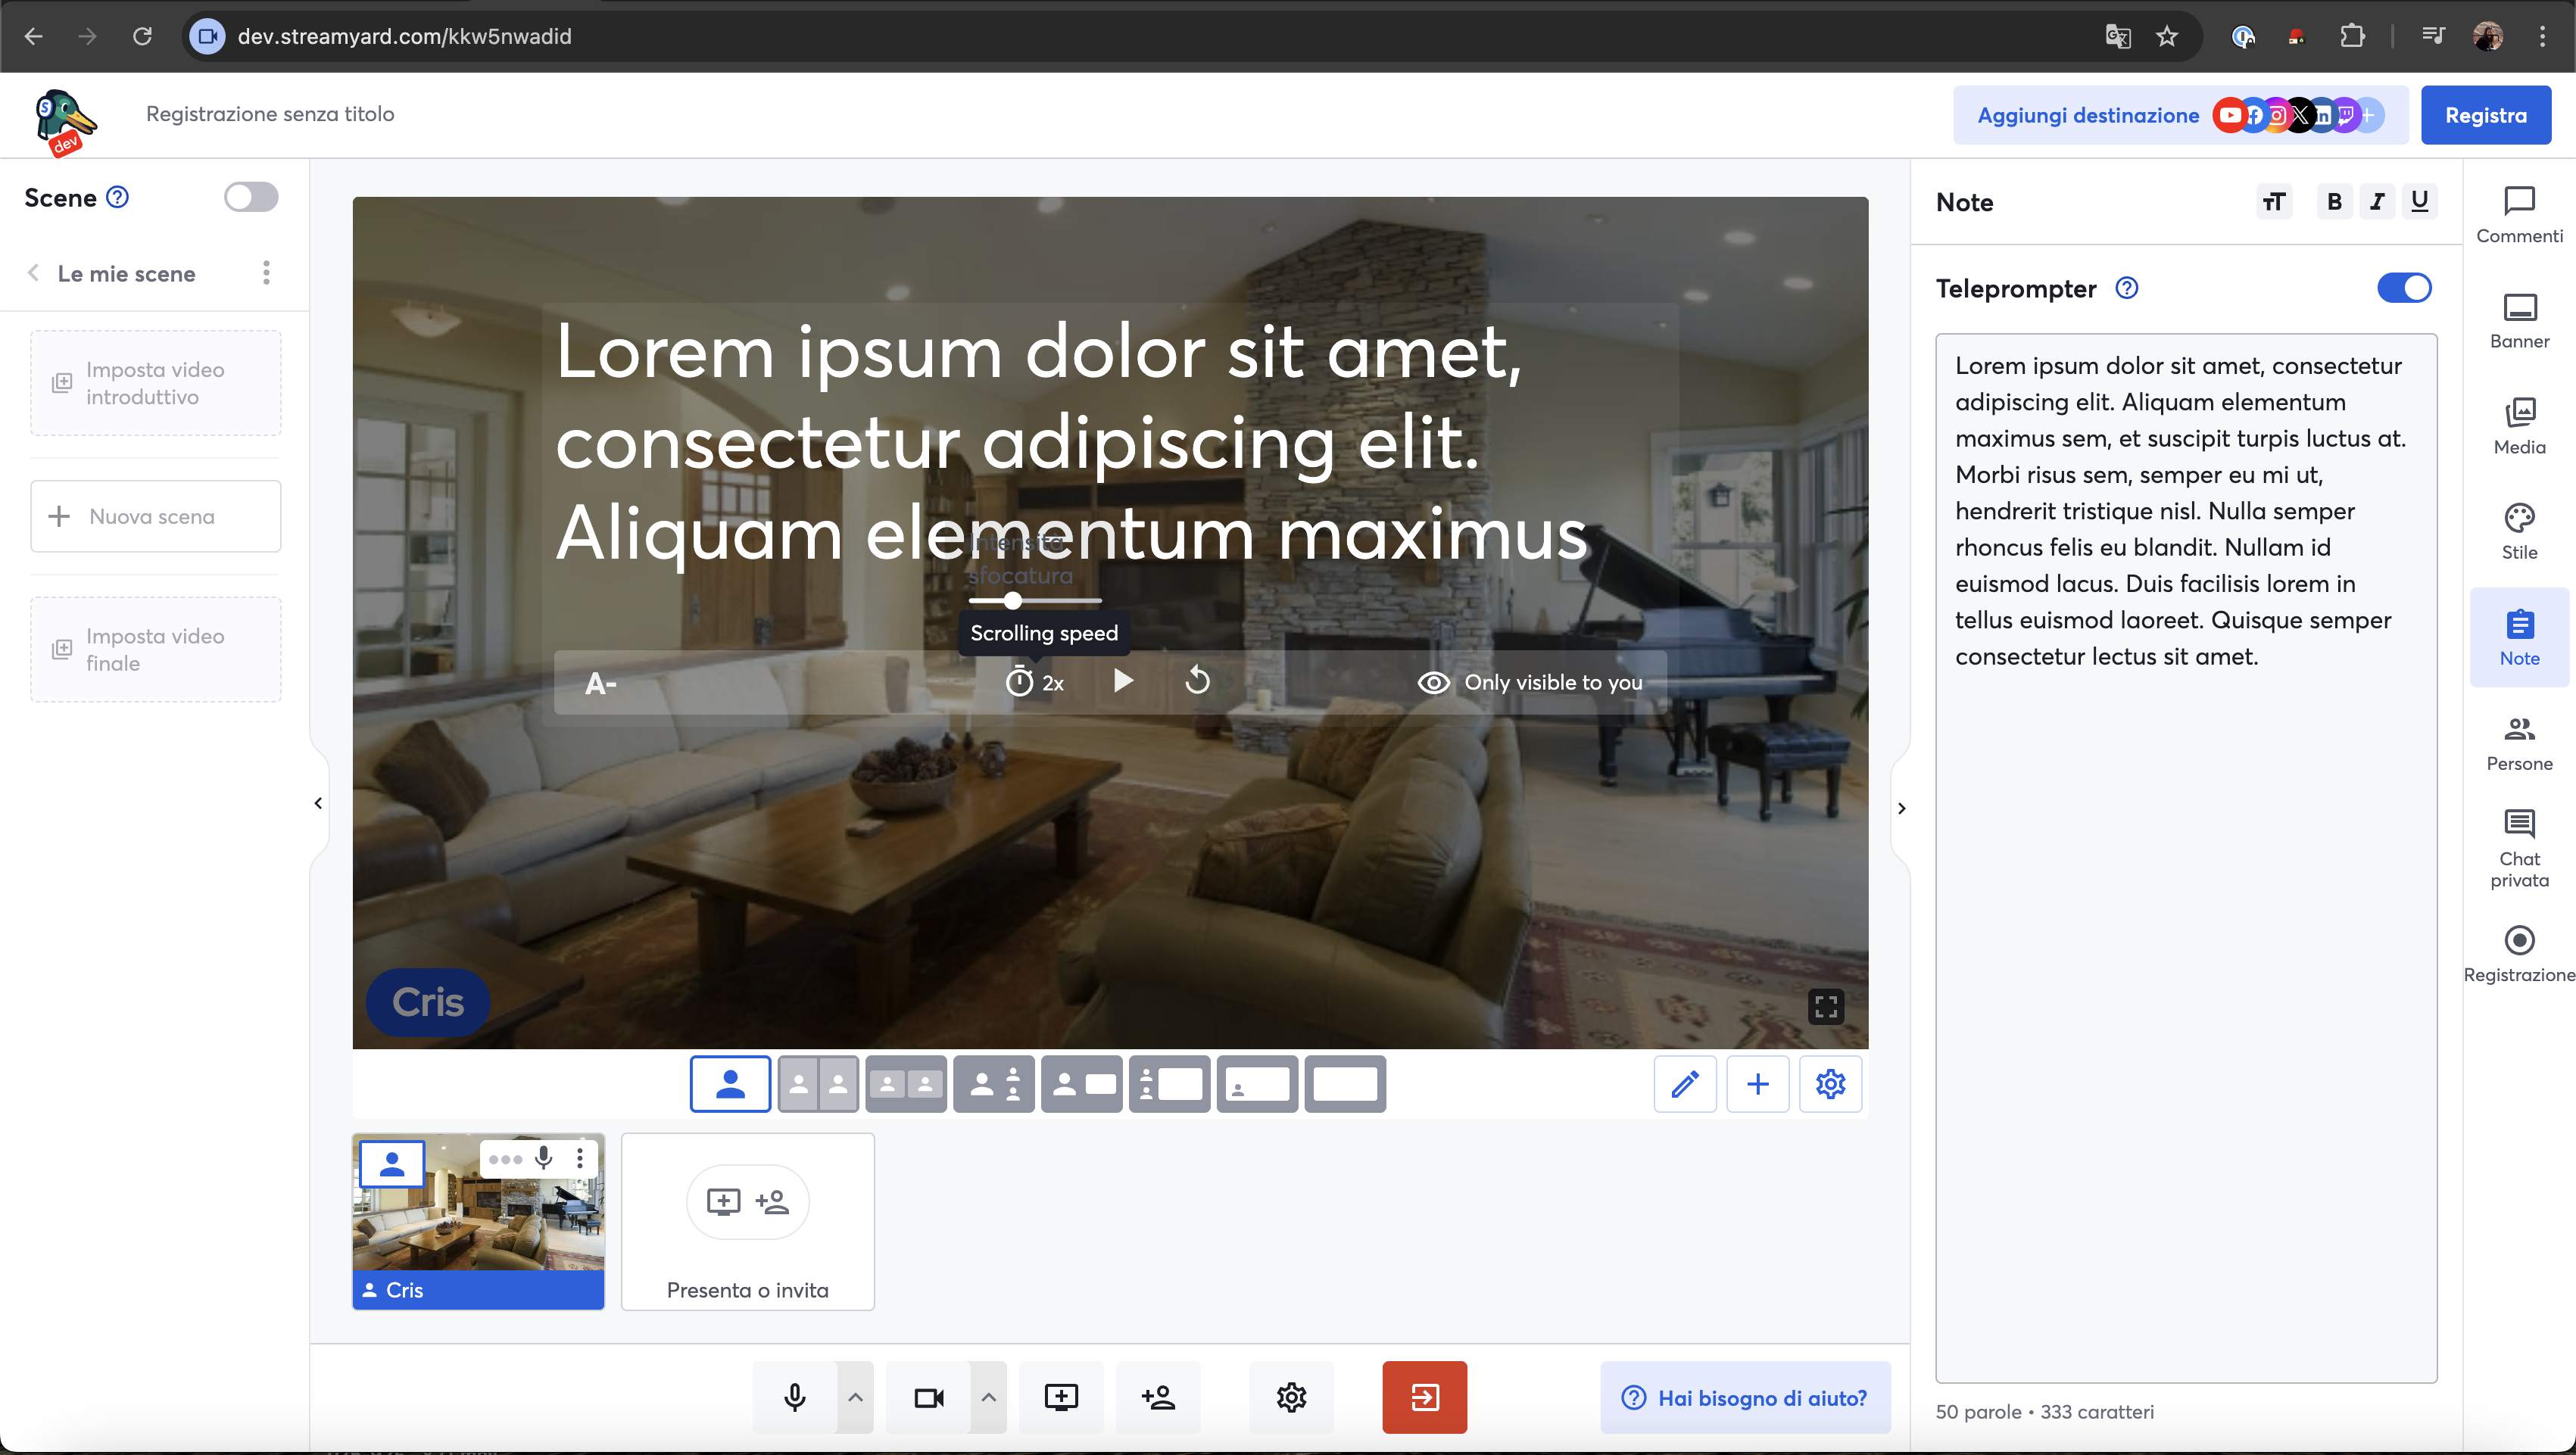
Building the Teleprompter
Seeing the success of using AI with Notes, I set out with the same approach.
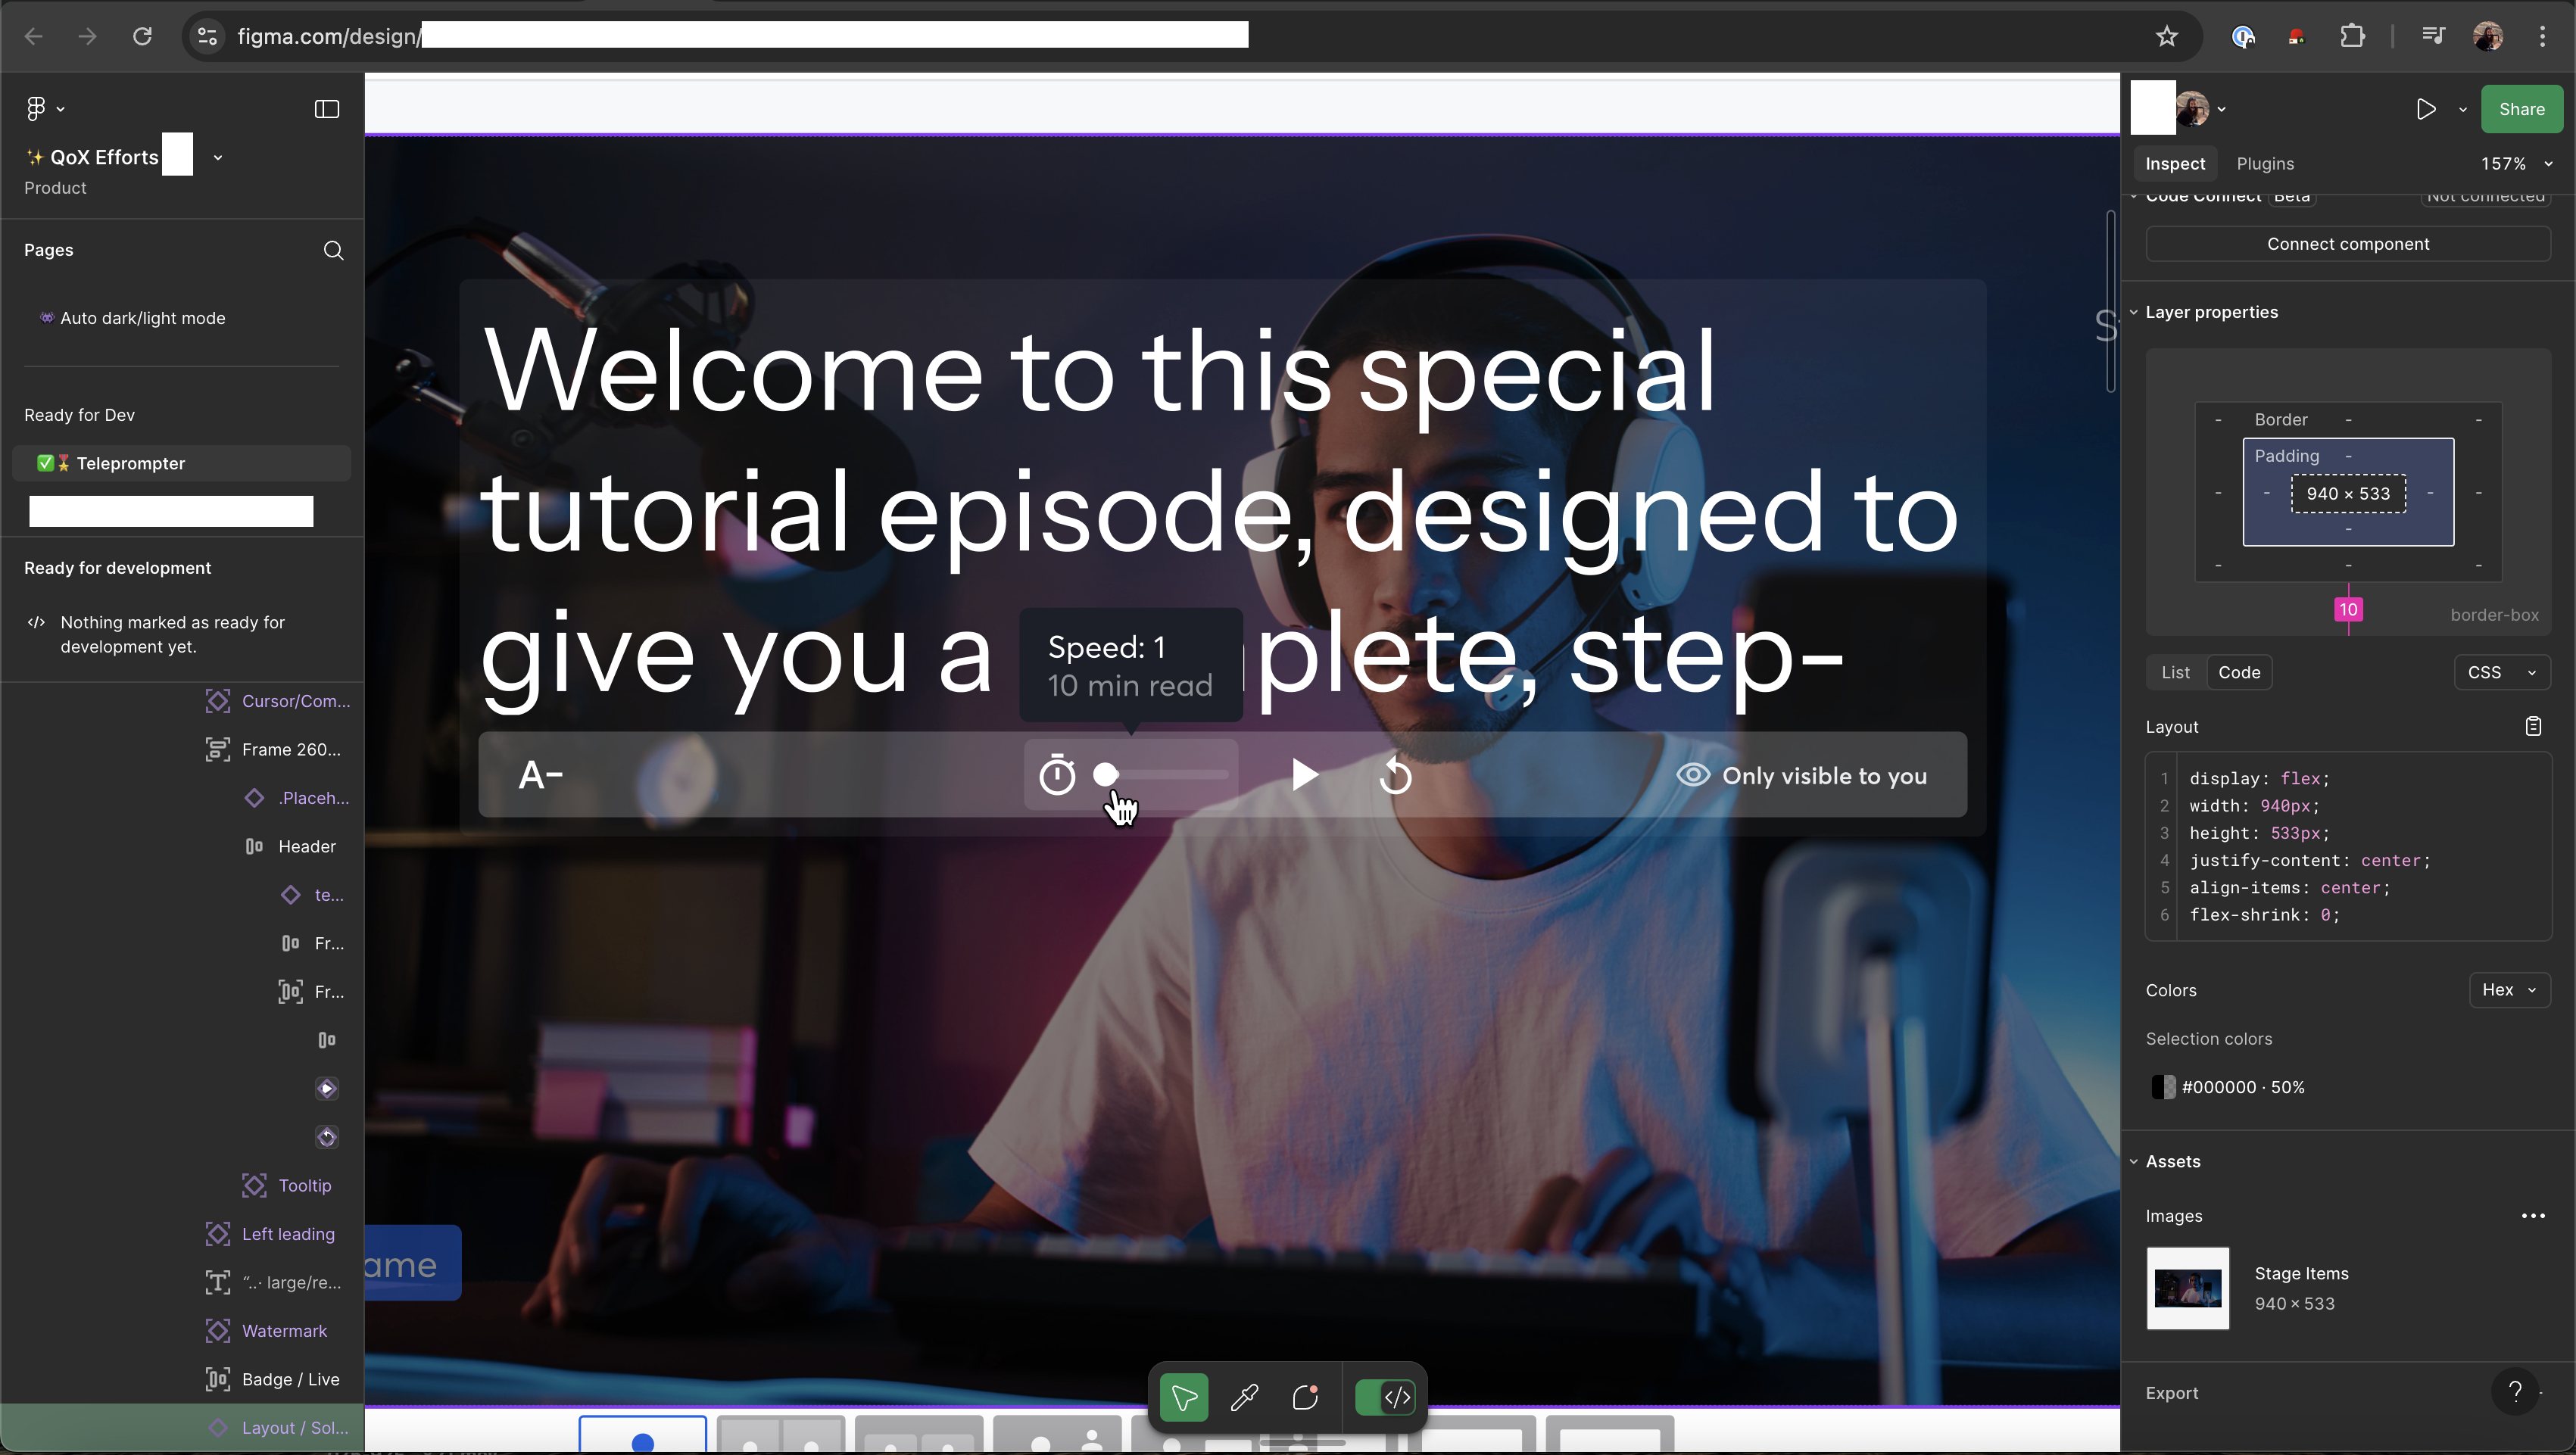
"Find the implementation of notes at XXX file. Now I want to add a Teleprompter. First, lets add a toggle in the notes header component XXX. For the toggle, you can reuse component XXX. When toggled, we should track the state in the ducks file XXX, follow the pattern of XXX_enable and mirror it for the teleprompter. Add the toggle in the design of image [XXX image]. Check the Stage component at XXX. On enabling the teleprompter, for now lets just add an opaque overlay that shows the current notes on it."
Since the image provided was of the full design, not only did it implement what I asked for correctly, but it also added some of the buttons. The UI was very simple and off, but functionality-wise it was great. Within 10 minutes of starting the task I again had a working MVP. Then it was a matter of adding the control buttons to allow users to increase and decrease text size, play and pause, replay, and control the scrolling speed to match their reading speed. After bouncing back and forth for a bit between Claude Code, Cursor and my own modifications, I had everything in place UI-wise. Now I had to add the remaining functionalities for these controls.
Get this: $0.51, shitty prompt, did all the work (+small help from cursor as some styles had to be changed). 105 lines added. No previous context, this was the first prompt of the session, and no lines of code or image pasted. Literally prompt was just:
1
im working on the teleprompter. i need a way to calculate the amount of time it will take to read something, on average. lets take the average reading speed, words per minute aloud to be 183 words per minute. so we should be srolling the text at this speed in the teleprompter. lets try to add the feature for the text to scroll at this speed once we click play
It immediately correctly added the scrolling feature. Not only that, but without prompting it, it added the different speeds, the pause/play, and the replay features. Also without mentioning it in the prompt, it handled the case where if notes are edited while scroll, it restarts. Best half a dollar of my life!
However, it of course wasn’t perfect: it did not respect the fact that we only want to show 3 lines. While not in the prompt, this was clear from the codebase, as we had line-height: 1.2;, max-height: ${props => props.isPortrait ? 'calc(1.2em * 6)' : 'calc(1.2em * 3)'};, but this can be done easily manually or with Cursor - the difference was because the ref had been set to the wrong container, so took me 2 seconds to fix. Really can’t complain.
The logic, which was not trivial and is quite cool, looks something like:
1
2
3
4
5
6
7
8
9
10
11
12
13
14
15
16
17
18
19
20
21
22
23
24
25
26
27
28
29
30
31
32
33
// Speed levels: slider value (0-3) maps to WPM (words per minute)
const SPEED_MAP = [
  120,  // 0 = 1x speed (slow)
  150,  // 1 = 2x speed
  180,  // 2 = 3x speed
  210,  // 3 = 4x speed (fast)
];

// Calculate how long it takes to scroll through all notes
const getScrollDuration = () => {
  const wpm = SPEED_MAP[scrollSpeed]; // Get WPM for current speed
  const durationMinutes = wordCount / wpm; // Time = words / words-per-minute
  return durationMinutes * 60 * 1000; // Convert to milliseconds
};

// Auto-scroll animation
const animate = (timestamp) => {
  const duration = getScrollDuration();
  const elapsed = timestamp - startTime;
  const progress = Math.min(elapsed / duration, 1); // 0 to 1

  // Calculate scroll position
  const maxScroll = container.scrollHeight - container.clientHeight;
  const scrollPosition = progress * maxScroll;

  // Update scroll
  container.scrollTop = scrollPosition;

  // Continue animation if not finished
  if (progress < 1) {
    requestAnimationFrame(animate);
  }
};
To be fully transparent, AI is sometimes also extremely shit. So here is another example where Claude failed miserably.
Prompt:
1
[Image #1] now lets change the ui for the stopwatch. on hover of the icon, the slider appears, with an extra overlay of background color XXX. check the in house Slider XXX component, we may be able to reuse it for this purpose. then instead of changing the speed in state by click, this will be done through the slider. now lets have the initial state be 2x, which corresponds to 183 wpm. then 1x is 150, and 3x and 4x follow a similar scale, not linear.
where Image 1 was:
It did fix the speeds and initial state, but UI was not good:
Claude immediately broke everything lol, but after using the correct imports and passing the correct inputs to in-house components, it worked. However, it did not understand where to place components. I find that Cursor tends to do a much better job at this kind of component-specific or UI tasks, while Claude is better at build-from-scratch tasks like the above previous attempt.
This is a great example of how I personally like using AI - I spent most of my time on this task manually building AI or with Cursor, but most of the work was done in 20 minutes by Claude. Balanced, as all things should be.
Conclusion
There is definitely thousands of different AIs that people keep hyping up nowadays, and as seen in my article about the Figma MCP, they are often times more of a waste of time than anything. But it is undeniable that finding a rhythm with a select few can make you x10 more efficient. Claude Code and Cursor are my trusted choices. Other than this, I have found successes in using the Sentry MCP for debugging, and recently the Notion MCP to gain context.